Friday, 23 October 2015

How to Make WoW: Blood Elf/Night Elf Eyebrows

 How to Make  World of Warcraft: Blood Elf/Night Elf Eyebrows!


PAX Aus is in a weeks time! So it was time to complete the finishing touches.


I started by using a light foam dough to form the shape of my eyebrows.


Once they were on point, I let them harden in the oven for 20 minutes.


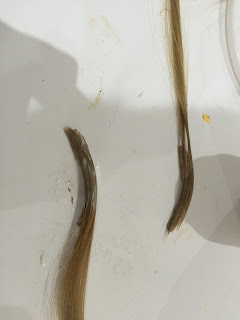
I wanted the eyebrows to match my wig colour, so cut off a chunk at the bottom of my wig, and cut them to shape. Approx 3 inches off my (normal) eyebrows.


After the baking was done, I covered the foam dough with a quick coat of tanned paint that matched my skin, then proceeded to use a lot of Modge Podge and swear words to fashion the hair on.


Spirit Gum was used to fashion them onto my face, using Glue and concealer to hide my natural eyebrows.

Hugs xoxo


Monday, 19 October 2015

How to Make a WoW: Blood Elf Mage Staff

How to make a WoW: Blood Elf Mage Staff


Turns out curtain rods make excellent staves! This particular one was on sale at Lincraft for $15. It is 2 meters long and perfect thickness for a staff, though it is a little heavy after holding it awhile. The things we Cosplayers put ourselves through!


The curtain rod set came with rod ends and curtain rings, perfect for the detailing I planned to include on the staff.


I wanted LEDs in my staff head, so rigged up a water bottle to the top end, so that I could screw it off to switch on/off the LED kit.


I secured the rings by using a craft putty as a glue/filler, followed by some Modge Podge over the top, for added strength. 


 A few layers of gold paint later, and it was looking pretty sexy!


The best part was when my printer decided to run out of ink, so, not to be defeated, I sticky taped paper over my monitor to trace out my diamond pattern for the staff head.


After my paper template was perfect, I started on the wire frame, using florist wire to bend and tie together, using the paper template to guide me.


The LEDS came with a battery pack, so I rolled them up in cellopane and shoved them into the wire, making sure the battery pack was at the bottom so I could switch it on via the bottleneck.


A few layers of cellopane over the top, using Super Glue and swearing to shove it into the waterbottle top, it was done and ready for PAX AUS 2015!


Thursday, 15 October 2015

How to Make a WoW: Blood Elf Mage Spell Book

How to make a World of Warcraft: Blood Elf Mage Spellbook


I was not planning to make a book. I have just been super organised with PAX Aus 2015, had some spare time, and figured it would be cool to make something cute to hold my phone, wallet, business cards etc.

I had an old cut-out book that I purchased from the Reject Shop some time ago so decided to use that as the base.


Using a light craft putty that I purchased from Linecraft, I rolled out the putty and cut out some horde emblems, as well as cornices for the corners of the book.


Baking them in my oven, they looked good enough to eat!


Once they were baked and not eaten, I laid out my template, adding some rope and sequins for a little more "Omph".


I was concerned that It was going to look a little flat, so made up a mix in a spray bottle of 2 parts Modge Podge, 1 part Gold Paint, and 4 parts water.

I laid out tissue paper over the book, then spray the mixture on it, using a small paint brush to push the paper into the gaps. It gave it a nice textured look, as well as helping to keep it all sealed down.


After what felt like DAYS drying, I did 2 more coats of metallic gold paint, then started on detailing.


Using a Bright red for the emblem and corners, It needed about 3 coats each.


And then the fun Wash time!

I made up a mix of 1 part black paint, 4 parts water, and used a thick brush to lightly cover the whole book. The black went into the creases to give a nice "Used" look, while escaping from the higher-up parts.

As a final touch, I added a satin ribbon as a bookmark, and screwed a nail up the top, so I can hang it off my mage book

Wednesday, 8 April 2015

DIY Bed Desk - Making Better Ikea Shit For Less


Ikea once sold one of the most glorious pieces of furniture for the Bed-Blogger.

The Malm Occasional Table
 Also known as Bed Desk.

Unfortunately, they don't stock them anymore.

And even if they did, it's probably not going to be the correct size. That would be way too easy.

So I decided to make my own :)

Here is how!


Step 1
Find your local hardware store (I went to Bunnings) and buy the following;

So off to Bunnings to go with a shopping list.
  • x1 Long Untreated Pine Plank Wood (It was 30cm wide, 1.9cm thick. I asked for them to cut it into 1 length of 1.65m, and 2 lengths of 65cm.
  • x1 Packet of cheap/crappy screws (Making sure they were less then 1.9mm long, so as to not drill through the thickness of the wood)
  • x4 Castors (The 1 directional ones, so the bed desk can only move forwards or backwards)
  • x4 Metal braces (I got quite large ones, as I was concerned about any sagging of the desk)
  • x2 Spray cans of Primer + Paint in White
  • x2 Spray cans of Crystal Acrylic Gloss
  • x1 Medium Sandpaper Block
  • x2 Drop Sheets

Step 2
Chuck a drop sheet down and start sanding all the wooden things before wiping away all that delicious, carcinogenic dust off them.

  
Step 3
Lay the wooden things flat on your drop sheet, and go nuts with your can of paint/primer. Don't forget the sides! Wait 2 hours before flipping the wooden things over to do the other side.

Step 4
Once completely dry, Go bonkers with a super shiny gloss lacquer. Try not to breath while doing this.


This stuff puts Pantene Pro V to shame

Step 5
Assemble time! Start with the wheel thingy's

  
Step 6
Attach the brackets to the long bit, then locate a wall or human to hold up the shorter bits, so you can screw them in next.


Step 7
Make coffee and enjoy


Wreak This Journal - No Really, You're Allowed To


Finally a Journal I might stick to. 

Wreak This Journal is a book created by artist, Keri Smith.

On the back page, it advises that it is to engage and inspire people/artists to think "outside the box".


What she actually means is that we now have an excuse to do stupid dumb shit. Like throwing paint, using food as a crayon, poking things with sharp pencils, and having showers before throwing yourself off a cliff.


And my book arrived today!!!


And a few example pages.


If you have never experienced buying a clean, innocent book, and then destroying it with coffee and fire, I suggest you look into it.

Go wreak a journal. You know you want to.